When it’s done right, email marketing can be incredibly powerful. With diagnostics apps like Google Postmaster Tools, you can maximize your outbound impact.
According to Litmus research, email marketing is the most valuable channel available to marketers, with an average return on investment (ROI) of $36 for every $1 spent.
With an ROI like that, it’s no surprise that almost half of all marketers (44%) use email as part of their digital strategies. However, its popularity can make standing out and engaging an audience difficult.
This is where those diagnostics tools can help you outpace the competition and stand out.
In this article, we’ll look at the main benefits of monitoring email diagnostics, tell you how to get started with Google Postmaster Tools and recommend ways of applying its data to get better results from your next campaign.
How do email diagnostics applications like Google Postmaster Tools help marketers?
Email diagnostics tools provide users with insights and analytics around how their emails are processed, allowing them to identify, monitor and fix deliverability issues.
By analyzing email marketing campaign metrics such as spam complaint rates (a measurement of how often recipients manually mark a sender’s messages as spam), IP and domain reputation levels (the sender’s reputation for sending high-quality or spam emails) and delivery error rates (deliverability issues or failure), marketers and other high-volume senders can optimize their campaigns to ensure genuine messages aren’t ignored or lost in recipients’ spam folders.
This kind of analytics is valuable to email service providers (ESPs), too. It helps create clearer divides between reputable senders and spammers so that legitimate messages get to the right places and both senders and receivers get the best possible experience.
How diagnostic data can improve your email marketing campaigns
The diagnostic data of platforms like Google Postmaster Tools allows you to gauge how you’re performing as a sender so you can identify opportunities for improvement.
For example, if a high percentage of your audience reports your latest campaign email as spam, you’ll see a higher-than-normal spam complaint rate and can investigate potential reasons. It could be that the tone of your messaging is overly promotional for a recipient at this stage of their customer lifecycle or something as simple as a misleading subject line.
You can then apply what you learn to your next batch of emails, keep track of changes and measure the impact.
Perfectly timed, value-packed marketing emails can still go completely unseen, however. This often comes down to the sender’s delivery reputation. If you build a reputation for sending unwanted emails over time, ESPs will start automatically diverting your messages to users’ junk folders.
Fortunately, you can also manage this using email diagnostics. By monitoring your IP and domain reputation data and maintaining trust with service providers, you can make sure emails always reach their intended audience.
Over time, these metrics and others will help you build a strong understanding of what your service provider and the various segments of your audience perceive as valuable. With that knowledge, you’ll be able to optimize campaigns to increase:
Open rates
Click-through rates
Engagement
Conversions
Loyalty
Ultimately, when more engaging and valuable emails consistently reach your target audience, you’ll close more sales.
The benefits of Google Postmaster Tools and how to get started
Launched in 2015, Google Postmaster Tools is one of the most prominent email diagnostics resources available to marketers.
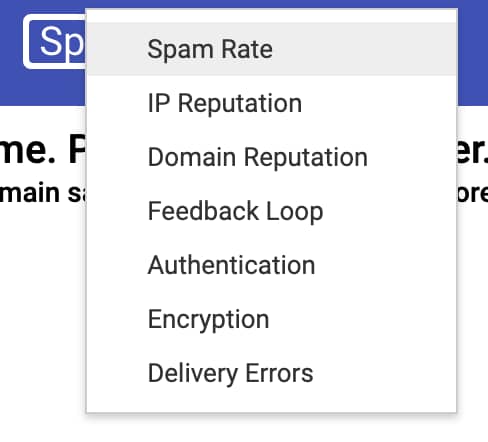
So, what is Google Postmaster Tools? The free application has seven dashboards showing different deliverability insights, which allow users to gauge how their campaigns are doing within the Gmail network.
The dashboards cover:
Spam rate
IP reputation
Domain reputation
Feedback loop
Authentication
Encryption
Delivery errors
Google introduced Postmaster Tools so that marketers could monitor how Gmail viewed their email activity. It’s important to note that it doesn’t provide insights from other service providers.
However, having 1.5 billion users (as of 2018) gives Gmail a market share of almost 40% (based on Radicati’s 2018 estimate of 3.8 billion email users worldwide).
Knowing how a platform of this size and global presence processes your mail, even if only part of your audience uses it, should help you understand how you’re perceived as a sender by other service providers, such as Yahoo Mail and Outlook. This is because ESPs generally share the same aim: to optimize their users’ experience.
Other email diagnostics platforms do exist. Many are paid-for, but Microsoft’s Smart Network Data Services (SNDS) is another free option. This provides similar (but less comprehensive) insights around Outlook, Hotmail, MSN and Live domains and could be worth considering if these ESPs feature more heavily in your mailing lists.
Google Postmaster Tools is also quick and straightforward to set up and use, making it suitable for most email marketers.
How to set up Google Postmaster Tools
To set up and use Google Postmaster Tools, you’ll need a Google account (Google Workspace or a Gmail address). If you’re planning to share access with other users, consider creating a new, dedicated account.
Here’s how to set up your account:
Step 1
Use your Google account username and password to log in at https://postmaster.google.com and select “Get started”.
Step 2
If it’s your first time logging into Postmaster Tools, a window should pop up automatically. Enter your sending domain and select “Next”.
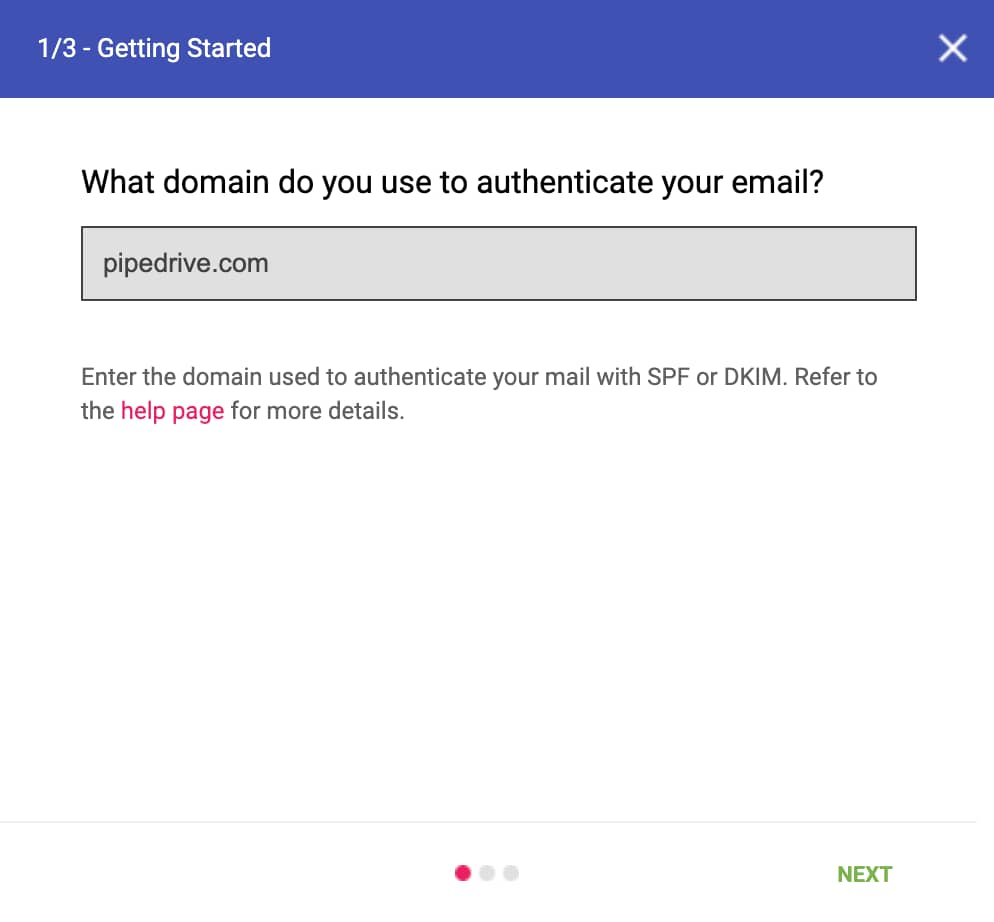
If the window doesn’t show automatically, select the “+” button.
Step 3
You now need to prove that you own the domain you just entered. In the next window, Google will give you a unique verification TXT record.
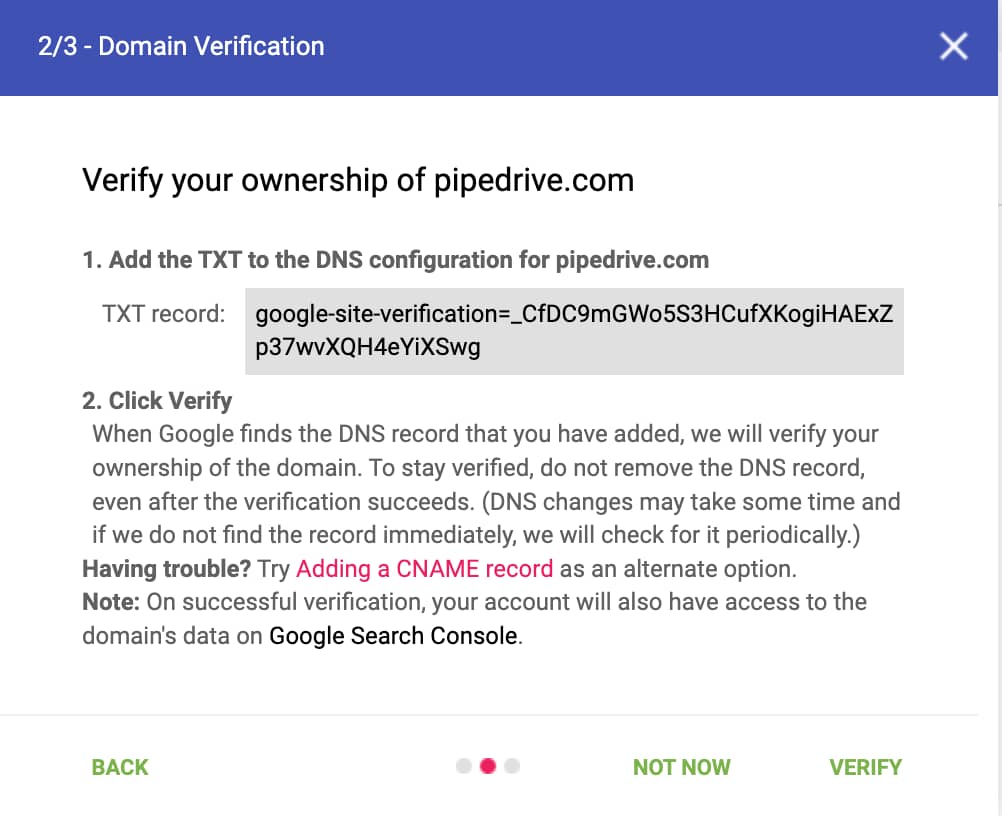
If you have the necessary access, add this to your domain’s DNS settings using your host’s admin or settings console before returning to Google’s window and selecting “Verify”.
If you don’t have access to your DNS record to make changes, you’ll need to ask your domain administrator or IT team to insert the TXT record for you.
If you have trouble adding the TXT record, an alternative method is to add a CNAME record, although you’ll still need access to your domain’s administration settings.
Step 4
If the verification process is successful, you’ll receive confirmation from Google in a new window, and you’ll see the status in your domain list has changed to “Verified”.
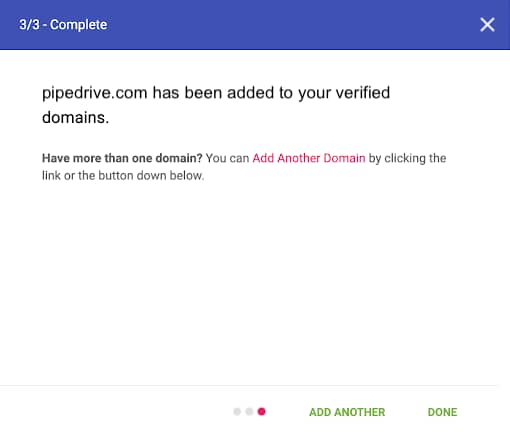

Step 5
You’re now ready to use Google Postmaster Tools. Select your newly added domain and choose your dashboard from the drop-down list.
Note: You may not see any data just yet. Google populates the dashboards daily and most dashboards only show data for domains with sizeable email traffic. There’s no official threshold, but you should see information for domains used to send 100 or more emails to Gmail accounts per day.
How to add a user to Google Postmaster Tools
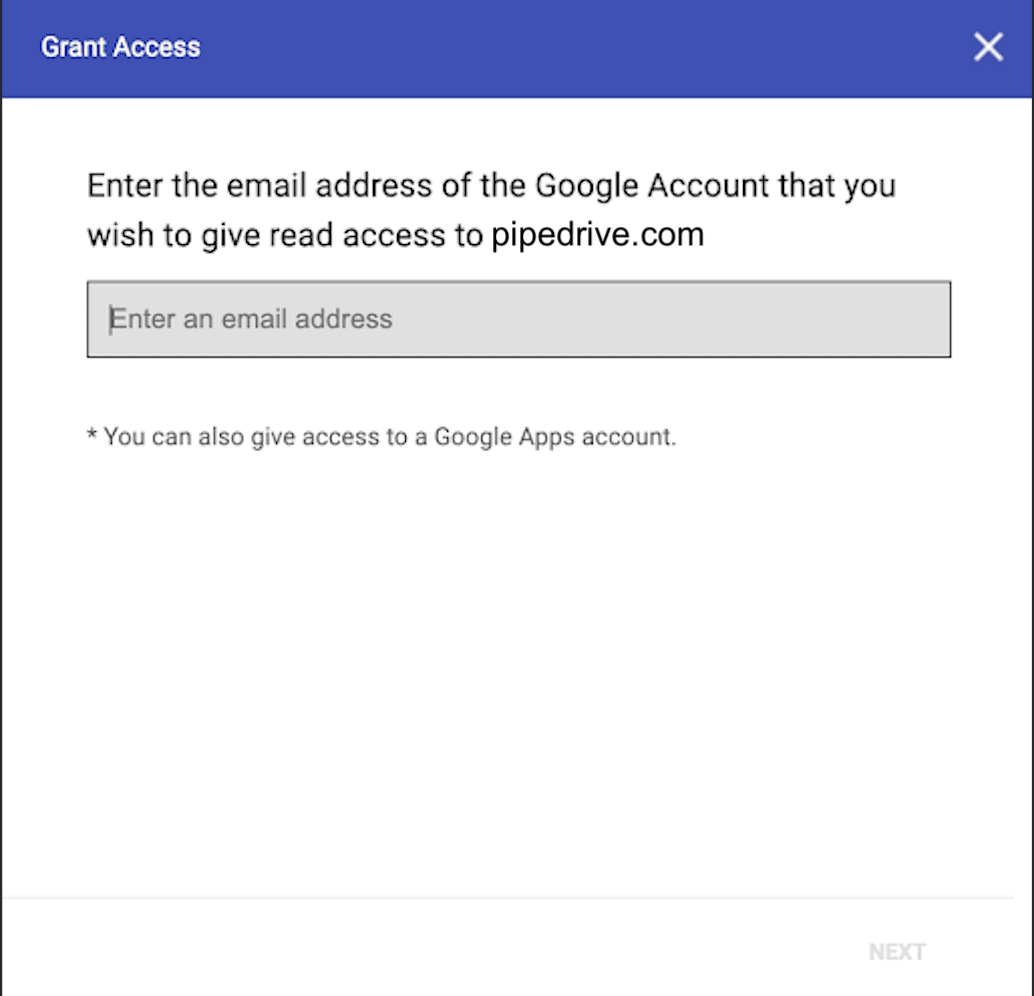
To add another team member or trusted external party to your Postmaster Tools account (giving them access to your domain data):
Sign in to Postmaster Tools.
Select the three vertical dots at the end of the verified domain you want to add someone to and choose “Manage Users”.

3. Press the red “Add” button at the bottom of the window and enter the new user’s Google or Gmail address into the pop-up form, then select “Next”.
How to use and get the most out of Google Postmaster Tools
No analytics tool is useful unless you understand its data. You’ve seen the list of metrics on offer; now, we’ll go through and explain how each one relates to your email campaigns.
1. Spam Rate
Spam Rate is a measurement of how often recipients manually report your emails as spam in their email clients. Google Postmaster Tools displays it as a percentage of all emails sent.
This measurement contributes to your Google Postmaster domain reputation, which helps determine whether your emails are automatically diverted to junk folders or not, so you should keep it as low as possible (<0.1%).
2. IP Reputation/Domain Reputation
All email originates from an IP address and domain and Google will determine your sending reputation based on the historic Spam Rates of both. Having a higher IP or Domain Reputation means your emails are more likely to go straight into your recipients’ inboxes rather than their spam folders. However, it is only one contributing factor.
Google rates IP and Domain Reputation using four categories:
Bad. The IP or domain has a record of sending a high volume of spam. Emails you send from this entity will almost always be marked as spam or rejected.
Low. The IP or domain is known to send spam regularly. Emails you send from this entity will likely be marked as spam.
Medium. The IP or domain has a record of sending high-quality emails but has occasionally sent a small amount of spam. Most emails from this entity will make it through to users’ inboxes unless there’s recently been a spike in spam levels.
High. The IP or domain has a history of very low spam rates and meets Gmail’s sender guidelines. Nearly all emails from this entity will make it past the spam filter with no issues.
3. Feedback Loop
Feedback Loop (FBL) is a Google feature that allows high-volume senders to identify campaigns in their domain traffic that receive large numbers of complaints from Gmail users.
It’s set up outside of the Postmaster Tools interface, but once it’s ready, you’ll see data presented in two graphs on your dashboard: one shows the average FBL spam rate and the other shows the number of unique identifiers as flagged by FBL per day.
4. Authentication
Google uses three email security protocols to help stop your organization’s email account from being spoofed (when an unauthorized party forges your sender domain, often to send scam emails in your name) or used for phishing.
The three standards (SPF, DKIM and DMARC) also work together to help prevent your outgoing emails from being marked as spam.
Sender Policy Framework (SPF) aims to prevent domain spoofing by tightening your DNS servers and restricting who can send emails from your domain.
DomainKeys Identified Mail (DKIM) uses a digital signature to show a message’s receiving servers that your organization definitely sent it. This aims to stop emails from being tampered with or compromised.
Domain-based Message Authentication, Reporting and Conformance (DMARC) is an additional method that passes or rejects a message based on whether its “from” details match the sending domain during SPF and DKIM checks. A match is called alignment and for your email to pass through, it must be aligned with information in one or both of the other security checks.
In Google Postmaster Tools, the Authentication dashboard shows the percentage of your email traffic that passes through each security check. You’ll also see the success rates for each protocol on the graph.
5. Encryption
Transport Layer Security (TLS) is another email security protocol. It encrypts messages to prevent unauthorized access during the transition from your email servers to your recipients’ servers, maintaining privacy.
If your email system is set up to work with TLS, it will attempt to negotiate TLS encryption with every server you send to or receive from.
If you send an email over a non-TLS connection to an account that is expecting encryption, it’ll bounce back to you. Incoming messages from non-TLS connections will also be rejected.
The Encryption dashboard in Google Postmaster Tools contains a graph showing the percentages of inbound and outbound emails passing TLS. If your pass rate is anything less than 100%, consider streamlining your contacts list to save wasting time and resources.
6. Delivery Errors
The Delivery Errors dashboard shows the overall percentage of your email traffic that gets rejected or temporarily fails compared to all authenticated traffic. Below the graph, you’ll see the list of failure reasons that will help you to investigate further and fix sending issues.
Here is a list of the error types you might see:
Rate limit exceeded. There’s too much traffic coming from your domain or IP address, so Google has put a temporary limit in place.
Suspected spam. Google’s systems suspect the traffic is spam.
Email content is possibly spammy. Google suspects the traffic is spam, explicitly based on message content.
Bad or unsupported attachment. The Gmail systems don’t support or can’t read your message’s attachment(s).
DMARC policy of the sender domain. The sender domain has configured a DMARC rejection policy.
Sending IP has a low reputation. The sending IP reputation is too low.
Sending domain has a low reputation. The sending domain reputation is too low.
IP is in one or more public RBLs (Real-time Blackhole Lists). The sending IP has been blacklisted for spam activity.
Domain is in one or more public RBLs. The sending domain has been blacklisted for spam activity.
Bad or missing PTR record. The sending IP is missing a DNS pointer (PTR) record.
How to stay out of your audience’s junk folders
Google Postmaster Tools’ diagnostics data can help you keep track of your reputation as an email marketer and show you when it’s necessary to make strategic changes to your email marketing strategy and campaigns.
The exact changes needed will vary, but the most crucial factor in engaging an audience is always value. When creating campaigns, take the following steps to avoid being banished to the junk folder:
Segment your audience so you can send relevant messages to the right people
Personalize emails with names and account information where possible
Don’t go overboard on selling your product
Keep your subject lines simple and straight-to-the-point
Provide value in everything you send
Take these steps regularly and over time, you’ll build a strong reputation with Google and other email providers that allows you to keep reaching your audience.
Final thoughts
Only when email service providers trust you as a high-volume sender not to detract from users’ experience of their services will you be able to harness the full power of email marketing.
The key to achieving that trust is through the diagnostics data of applications like Google Postmaster Tools. Use them to learn about and meet your audience’s quality expectations and you’ll have no trouble engaging prospects through this invaluable marketing channel.


